|
Quick
Start Guide
1.
When
fGIS first starts, you must open an existing project file (ending
in ".ttkgp") or type in the name of a new map
project. (Note:
The "default.ttkgp" project that comes with fGIS is
actually a Wisconsin Transverse Mercator shapefile with "Welcome
to fGIS" as a line label positioned in northern WI.
That could cause problems if you add layers using a different
projection to the default project. Since fGIS uses the first
loaded layer as the project's base coordinate system, it is
better to type in a new project name and then begin your new project
by adding a layer using the desired projection.)
2.
Next
click the yellow "+" button (the Add Layer command)
in the menu bar and navigate to a folder containing map layers
(geo-referenced images or vector objects representing point locations,
lines or areas). Double-click the file you want to add to the
view (or hold down the Ctrl or Shift keys to select multiple data
files to load). Loaded layers must all share a common coordinate
system if they are to line up.
3.
Double-click a layer name after it is listed in the legend to
access the Properties dialog to change the appearance features
of the data.
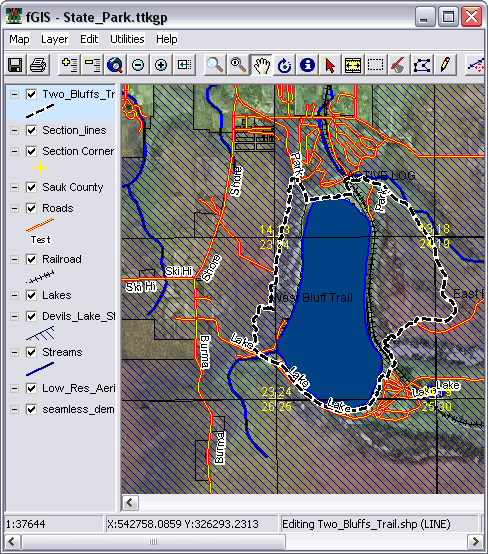
As
an example, you might want to download the fGIS
State_Park.zip or
Arborvitae.zip project to experiment with. To save download
time, low resolution imagery is provided in the zip files, 2 to
3 MB in size.
To digitize a new shapefile
vector layer:
1.
Use
Edit>New Layer (or right-click the map area and choose New
Layer). Pick either a point, line or polygon object layer to create.
Keep in mind that before you can create a new shape layer, at
least one pre-existing layer (either vector or raster data) must
be added to the view. fGIS will use use the first layer to establish
a world space.
2.
Give
the new layer a name and save it.
3.
If
it's not already selected, click on the New Shape Tool (pencil
tool). Click points on the map area to define the object. Be
sure to digitize polygon area shapes in a counter-clockwise direction.
4.
Right-click the map area and Stop Editing. Save the edits.
5.
In
the legend (layer list), double-click the name of the new layer
to access properties controls to change how the object is displayed.
When you are done with
an edit session, save the fGIS project file.
An fGIS project file
keeps:
·
A
table of contents of all your map layers with a record of where
the data are stored
·
Whether
or not a layer was turned on (visible) when the project was last
saved
·
The
layer properties that you set
·
The
last zoomed screen view
|