|
USAPhotoMaps
retrieves TerraServer aerial photos, topographic maps, and urban
area map types (below). The freeware program from JDMCox
Software also displays elevation data, place names, USGS landmarks,
TIGER (US Census) roads, road names and your own GPS data. It
is one of the fastest tools available for navigating to any location
in the United States and collecting TerraServer image tiles for
base maps. Assemble image tiles into single, georeferenced base
maps that can be opened by geospatial programs or drawing programs.
Use USAPhotoMaps to quickly get latitude, longitude or UTM coordinates
for any position. GPS waypoints, routes and tracks can be created
and displayed as map overlays and transferred to or from GPS units.
 |
 |
 |
|
Photo (P)
|
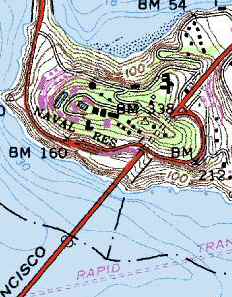
Topo (T)
|
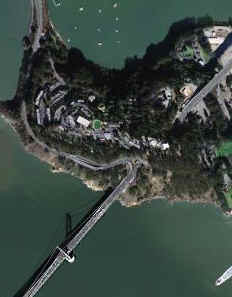
Urban (U)
|
|
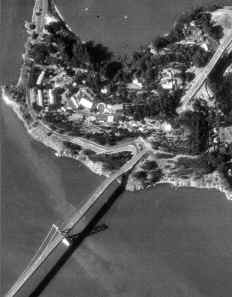
 You
can switch between the three map types by tapping P, T or
U on the keyboard. Part of the San Francisco-Oakland Bay
Bridge is shown above. At the closest zoom level, grayscale
photos are 1-meter resolution, topographic maps are 4-meter
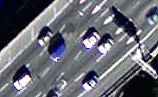
resolution, and the color urban photos get really close
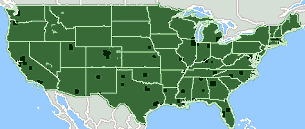
as shown by cars on the bridge (left) at .25 meter per pixel
resolution. Urban area coverage is limited to the dark blocks
in the map below. You
can switch between the three map types by tapping P, T or
U on the keyboard. Part of the San Francisco-Oakland Bay
Bridge is shown above. At the closest zoom level, grayscale
photos are 1-meter resolution, topographic maps are 4-meter
resolution, and the color urban photos get really close
as shown by cars on the bridge (left) at .25 meter per pixel
resolution. Urban area coverage is limited to the dark blocks
in the map below.
|
USAPhotoMaps comes packaged with an installer that unzips the
program and places a shortcut (below) on your desktop.

Start
USAPhotoMaps and begin the process of image retrieval by choosing
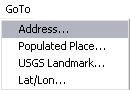
a location. The simplest approach is the GoTo utility from
the menu bar, which gives the following options:
-
The
Address option requires at least a city and state or
zip, but it can take you to a specific street address.
-
The
Populated Place and USGS Landmark options require additional
data files from the USAPhotoMaps site. If you use this feature
and the data files are not present, USAPhotoMaps will retrieve
and copy the files to your PhotoMaps directory. The initial
download may take a few minutes. Once installed, you can zoom
straight to your destination by selecting it from an alphabetical
list.
-
The
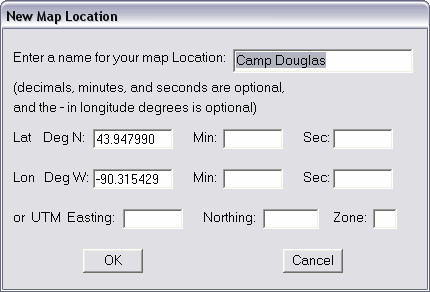
Lat/Lon option, similar to the File>New Map Location
menu below, asks for an initial latitude/longitude or UTM
coordinates for your project. For the Lat/Lon, you can use
decimal degrees or enter degrees, minutes and seconds.
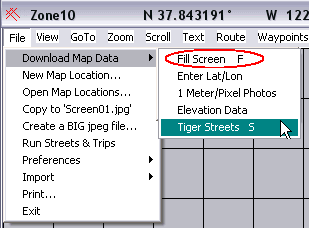
After you click OK, the screen will first display a grid of gray,
blank placeholders. Click on "File>Download Map Data>Fill
Screen" (or tap "F" on the keyboard),
and the tiles begin to fill in.
You
can scroll the screen with the arrow keys on your keyboard or
zoom out (Page Up key) and ask the program to again fill the screen
(tap the "F" key). Zoom in again with the Page
Down key.
How
long does the download procedure take? If you want an image about
4.5 square miles square (about what you'd fit on a computer monitor
at 1024x768 resolution when the zoom is set to four meters per
pixel), USAPhotoMaps will retrieve approximately 1.6MB of data.
At 1-meter resolution, 280 TerraServer tiles are downloaded. With
an Internet connection receiving data at about 30KB/second, it
takes a little less than one minute to download the images. The
process is smooth with a broadband connection, but some people
may experience hang-ups if they are using a slow modem.
TIGER Roads
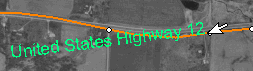
 Aerial
photos clearly show roads and streets but not road names. Use
the File>Download Map Data>Tiger Streets command
(shown above, or tap S on the keyboard) to solve that problem.
USAPhotoMaps presents a list of states and counties. Pick the
one for your area of interest, and the required data will be downloaded
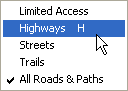
and saved to your PC. Use the command View>TIGER Streets to
pick the type of road layer to display. Move your mouse over a
road node to view its name as shown in the example below: Aerial
photos clearly show roads and streets but not road names. Use
the File>Download Map Data>Tiger Streets command
(shown above, or tap S on the keyboard) to solve that problem.
USAPhotoMaps presents a list of states and counties. Pick the
one for your area of interest, and the required data will be downloaded
and saved to your PC. Use the command View>TIGER Streets to
pick the type of road layer to display. Move your mouse over a
road node to view its name as shown in the example below:
If
you want to use the downloaded images in a geospatial program
like fGIS, Map
Maker or Global Mapper,
you'll need to use the procedure described below to merge the
tiles and generate a GIS World Coordinate file. NOTE: TIGER roads
or elevation lines are vector objects which are not saved when
you use the following "Create BIG jpeg file" tool.
Merging Images with USAPhotoMaps
|
|
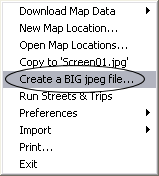
USAPhotoMaps
includes a utility to "Create a BIG jpeg file",
found under the File menu. It will assemble the image
tiles downloaded by USAPhotoMaps into one georeferenced
image. Just drag a bounding box on your screen with
the PC mouse, and the tiles will be combined into one
image file ending in "jpg" and an accompanying
"world coordinate file" ending in "jgw".
|
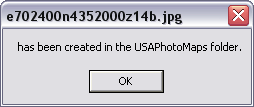 |
The
program will save the two associated files to the USAPhotoMaps
folder on your PC. The file names like the example on
the left are based on the UTM coordinates of the top-left
corner and the UTM zone number.
You
might want to move two "jpg" and "jgw"
files to a project folder. Rename the files if you wish,
but make sure the first part of each file name is identical
(such as Camp_Douglas.jpg and Camp_Douglas.jgw). That
way, mapping programs can find the world coordinate
file associated with the image.
|
|
|
|
The world coordinate file
from the preceding process would look something like
the following if you were to open it with a text editor:

Click here
if you want to know what each line means. Since the
names of the map coordinate system and datum are not
part of the world coordinate file, many mapping programs
will need you to provide that information. TerraServer
aerial photos and topographic map images use the Universal
Transverse Mercator (UTM) projection and the NAD83
datum. You'll also need to provide the UTM
zone number. Using the world coordinate file
and the name of the projection/datum/zone, mapping programs
can correctly position the image in relation to other
geographic data.
If you need to change
the projection of the image to some other coordinate
system, see the Digital
Grove tutorial on GDALWARP. fGIS
and HyperCube can also be used to warp a TerraServerUSA
image to another projection.
|
Using USAPhotoMaps
with your GPS Unit
If you have a GPS Unit, USAPhotoMaps
can connect to it and display your waypoints and tracks directly
on TerraServer images. The program will work with any brand GPS
receiver as long as it comes equipped with a serial cable (or
USB cable for Garmin units) for the PC and supports either a Garmin
or NMEA protocol.
You will need to set up USAPhotoMaps
so it can find where your GPS unit is connected and so it knows
what transfer rate to use. That may require some trial and error.
See the GPS Help in the program.
Select GPS>Track>Receive,
and the track points will be saved as a file and displayed as
a poly-line overlay on the photo as shown below. Waypoints can
also be received and displayed in a similar manner.
Another very useful feature of USAPhotoMaps
is its ability to send waypoints to your GPS unit. Say you want
to explore a parcel of woodland, and you'd like to know when you
are getting close to the corners of the property when you are
out walking around...
|
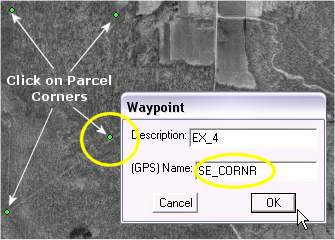
You
can pick and name the property corners (or other features)
on an aerial photo:
|
...and
use USAPhotoMaps to send them as waypoints to your GPS:
|
|
USAPhotoMaps Screen Capture
|
Garmin
GPSMAP 76 Screen Showing Waypoints Transferred by USAPhotoMaps
|
As you navigate with the GPS
unit in the field, you will be able to use the corners that you
marked and sent as reference points. If you have downloaded
elevation data with USAPhotoMaps, the GPS points that you
send to your GPS unit with USAPhotoMaps will include USGS DEM
height data.
If you can't pick out the points
you want to transfer from the aerial photo, you can switch the
view to the topographic map option:
The topographic map view provides
section lines and other reference marks that might be clearer
than on the aerial photos. The resolution of the topo maps is
limited, however, to four meters per pixel as compared to one
meter per pixel maximum for the aerial photos.
Adding Elevation
Data
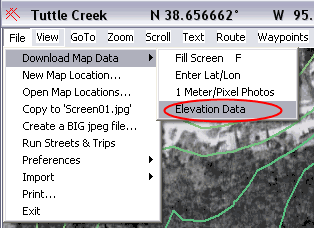
USAPhotoMaps can retrieve elevation
data from the USGS and add it to your project. First, use the
File/Download Map Data/Elevation Data command (below).
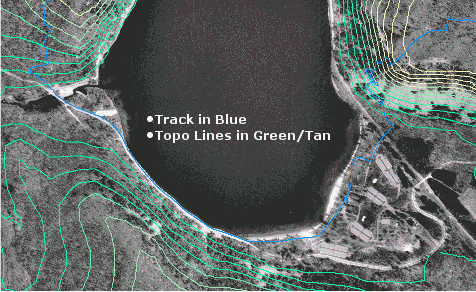
Instructions that appear will ask
you to click on the tiles that you want elevation data for. The
program downloads the information and will display contour lines
as shown below if you turn them on (tap "C" on the keyboard).
Zoom in to see the lines.
Another useful feature of USAPhotoMaps
is retrieval of the date imagery was produced. Find the date tool
under the Help menu.
Real-Time Location Display
 If
you travel with a GPS unit and laptop PC, USAPhotoMaps can display
your real-time track on a photo or topo map as you move. Simply
connect the GPS unit to your laptop PC via a serial cable, start
USAPhotoMaps, and select "GPS>Show Location". If
you travel with a GPS unit and laptop PC, USAPhotoMaps can display
your real-time track on a photo or topo map as you move. Simply
connect the GPS unit to your laptop PC via a serial cable, start
USAPhotoMaps, and select "GPS>Show Location".
If you plan to use the program
in real-time, download or transfer your background image tiles
to the laptop or a CD in advance. The "USAPhotoMaps.txt"
file that comes with the program explains the procedure for saving
image tiles to a CD. Take care when you are in a moving vehicle
to watch the road, not your laptop screen.
Download USAPhotoMaps and Data Sets
Back
to Toolbox
|